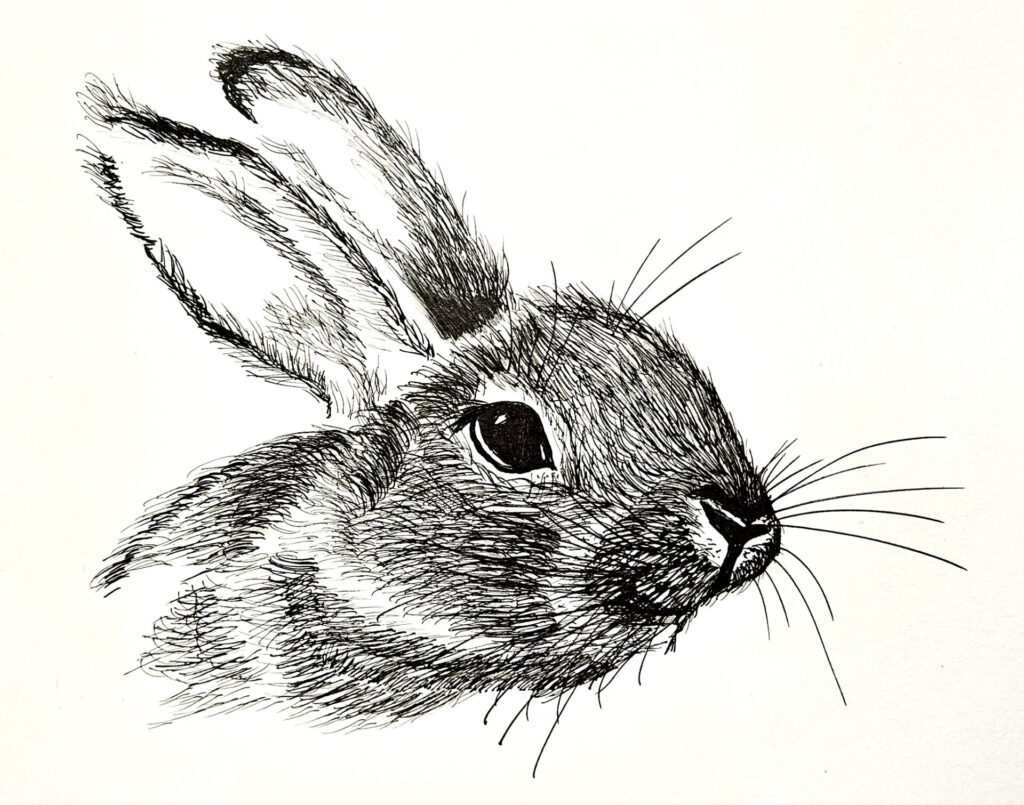
I decided to do a little art therapy the other day and drew this little rabbit. I found a reference photo while doing an image search on Google. At first, I was going to use only graphite pencils, but in the end, I mostly used my ink pens. I really like the look of it!
My List of Art Lessons on YouTube
On my YouTube channel Rain Frances Art, I offer drawing and painting lessons. Some are time-lapsed and there are shorts there, but the majority now are real-time. Click on this link and it will bring you to my index page where you can browse through over one hundred drawing and painting lessons!
The Supplies I Used To Draw My Little Rabbit
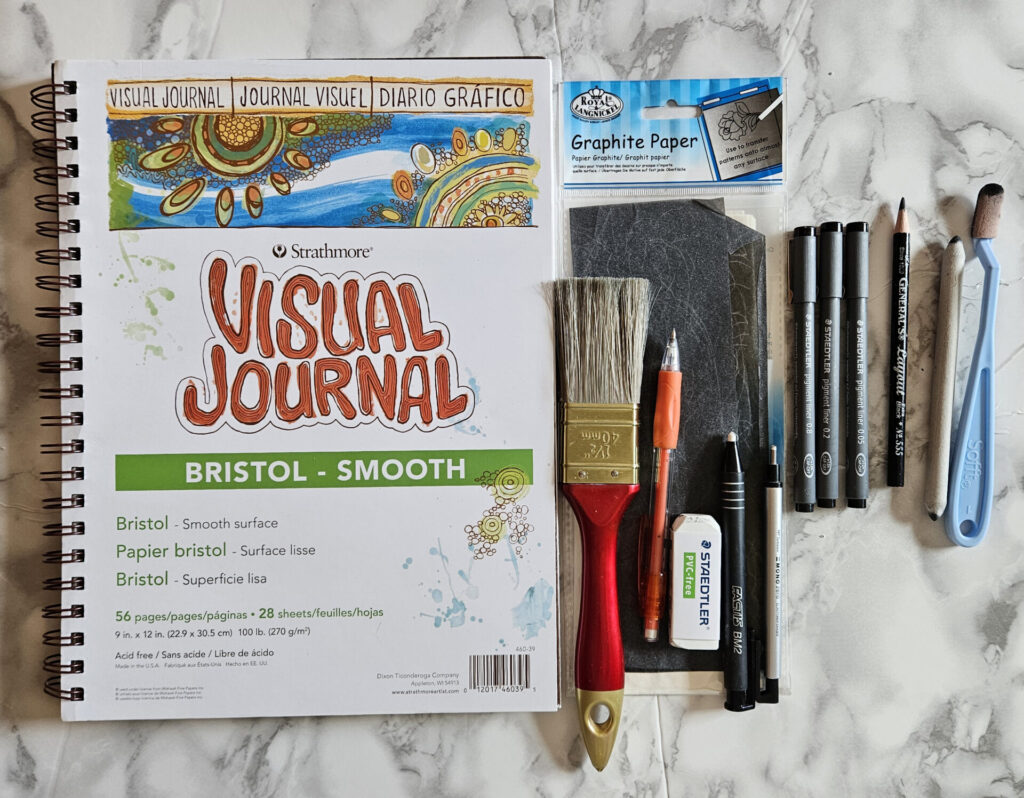
For this drawing, I used my Visual Journal – I love these journals! I have several for drawing and painting. This particular journal is “Bristol Smooth” – the surface is great for ink and pencil. I used graphite transfer paper to transfer my stencil onto my canvas. I always have an old paintbrush handy to dust off my page; as well as a regular pencil and various erasers. I used a 6B graphite pencil and a few blenders (blending stump and SOFFT brand foam-tipped blender). Finally, I used 3 sizes of ink pens to get the look I wanted: 0.05, 0.2, 0.8.
I also used an ultra fine-tipped Sharpie marker, forgot to put it into the photo!
My Drawing Process
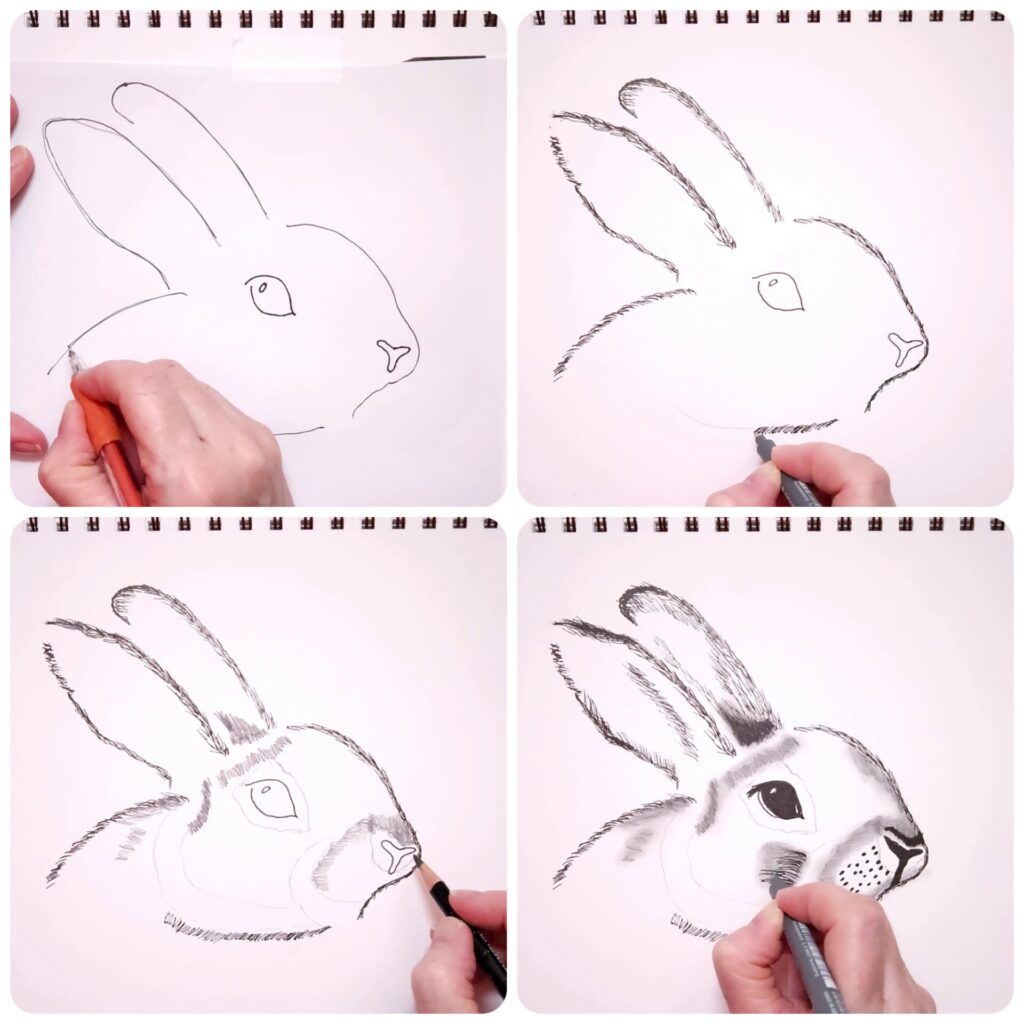
I started with a very simple stencil that I drew, you can download and print it here. I transferred my stencil onto my canvas using the graphite transfer paper. With my 0.8 ink pen, I outlined the rabbit using small strokes. I added and blended in some dark graphite pencil to the areas where I saw the darkest shading on the reference photo. I colored in the eye and nose area with ink, added more stroked-shading, and some dots where the whiskers would be.
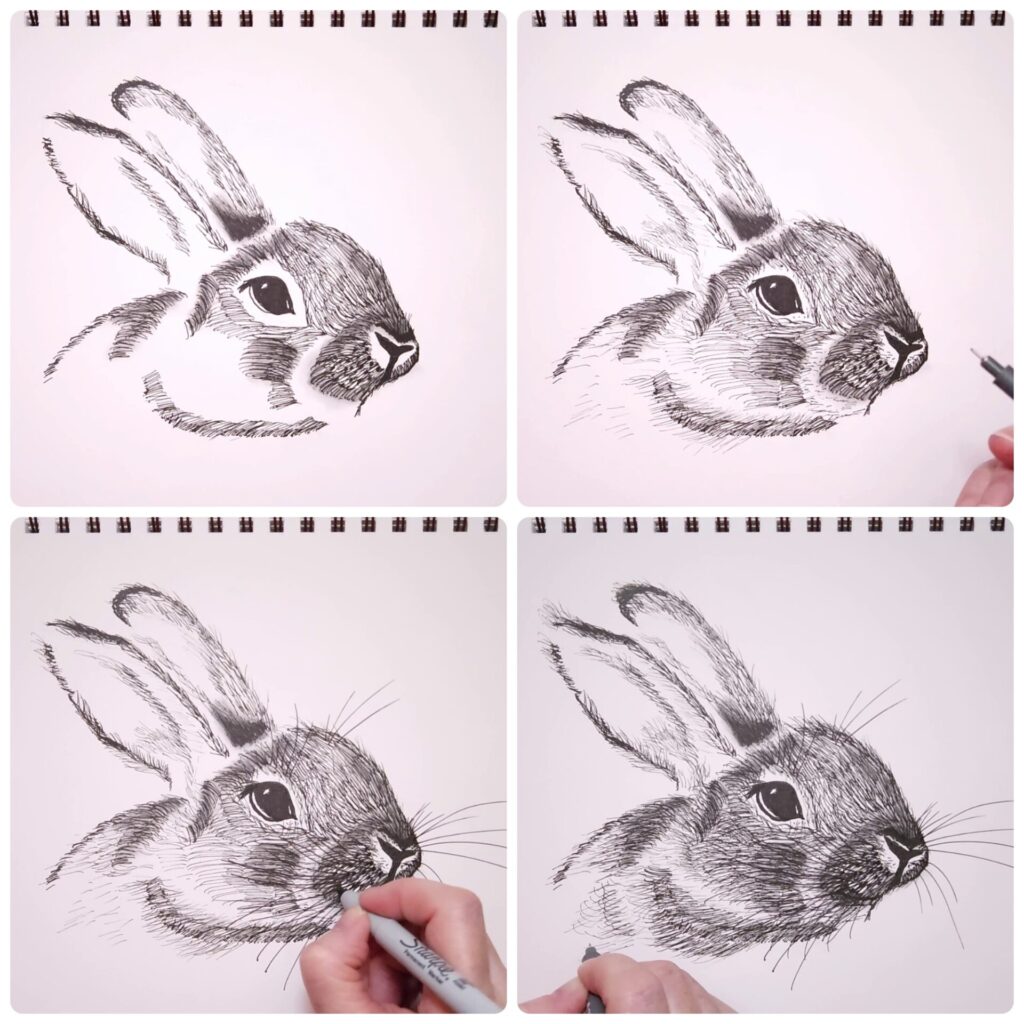
To create the fur, I kept adding more stroked-shading with my ink pens until I thought the rabbit looked more on the realistic side. The final touch was adding whiskers with my Sharpie pen.
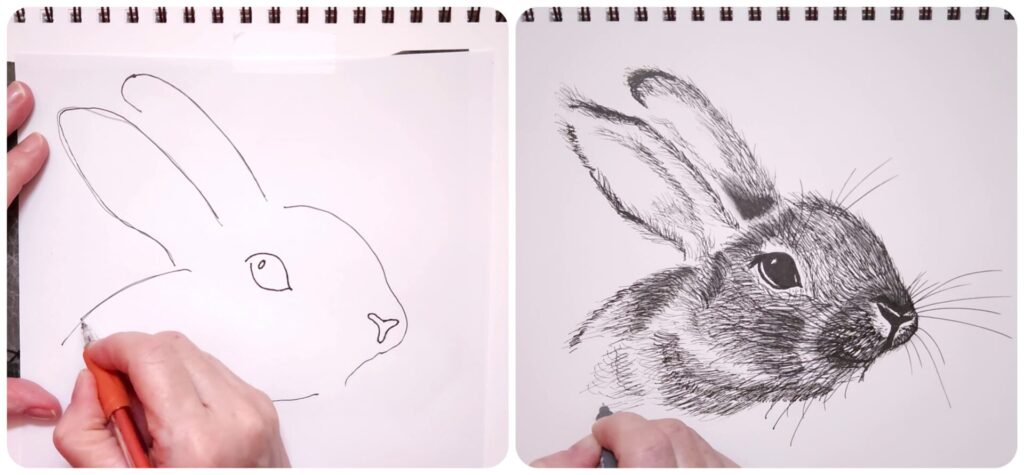
I love seeing the before and after photos next to each other! I have the real-time video art lesson embedded at the end of this post if you’re interested.
Would you like to be notified whenever I publish something new on my website?
Just fill out this form:
Real-Time Art Lesson and Supply List
If you’d like to try drawing this rabbit, why not check out my real-time art lesson? It’s about a 45-minute lesson and it’s up on my YouTube channel.
Here are the supplies I used:
- Visual Journal “Bristol Smooth” drawing paper, 9 x 12”
- Black graphite transfer paper
- Stencil
- Fine-tipped black markers: 0.8, 0.2, 0.05
- Ultra fine-tipped black Sharpie marker
- Graphite pencil: 6B
- Blenders: 3/8” blending stumps, Sofft brand foam blender
- Pencil and eraser
- Dollar Store paintbrush to dust off my canvas
Let me know in the comments if you tried my Rabbit Drawing!


